EventBridge Ruleデバッグ方法メモ
Table of Contents
背景・動機
業務をしていると、「EventBridgeでメタ情報を付与してSQSに流す」といった要件に出くわす機会がある。
e.g. AWS SQSとLaravelで大規模トラフィックを捌く - phpcon新潟
Event Busが一次受けをして複数のEventBridge Ruleでマッチしたものに情報を付与して次に流す、といった挙動になっている。
EventBridge RuleのデバッグをするにはAmazon EventBridge でイベントに応答するルールの作成 に書いてあるとおりにやればいいのだが、AWSのドキュメントは初学者から見たら分かりにくく混乱した。 今回は後学の為に画像付きでメモしておく。
試したこと・やったこと
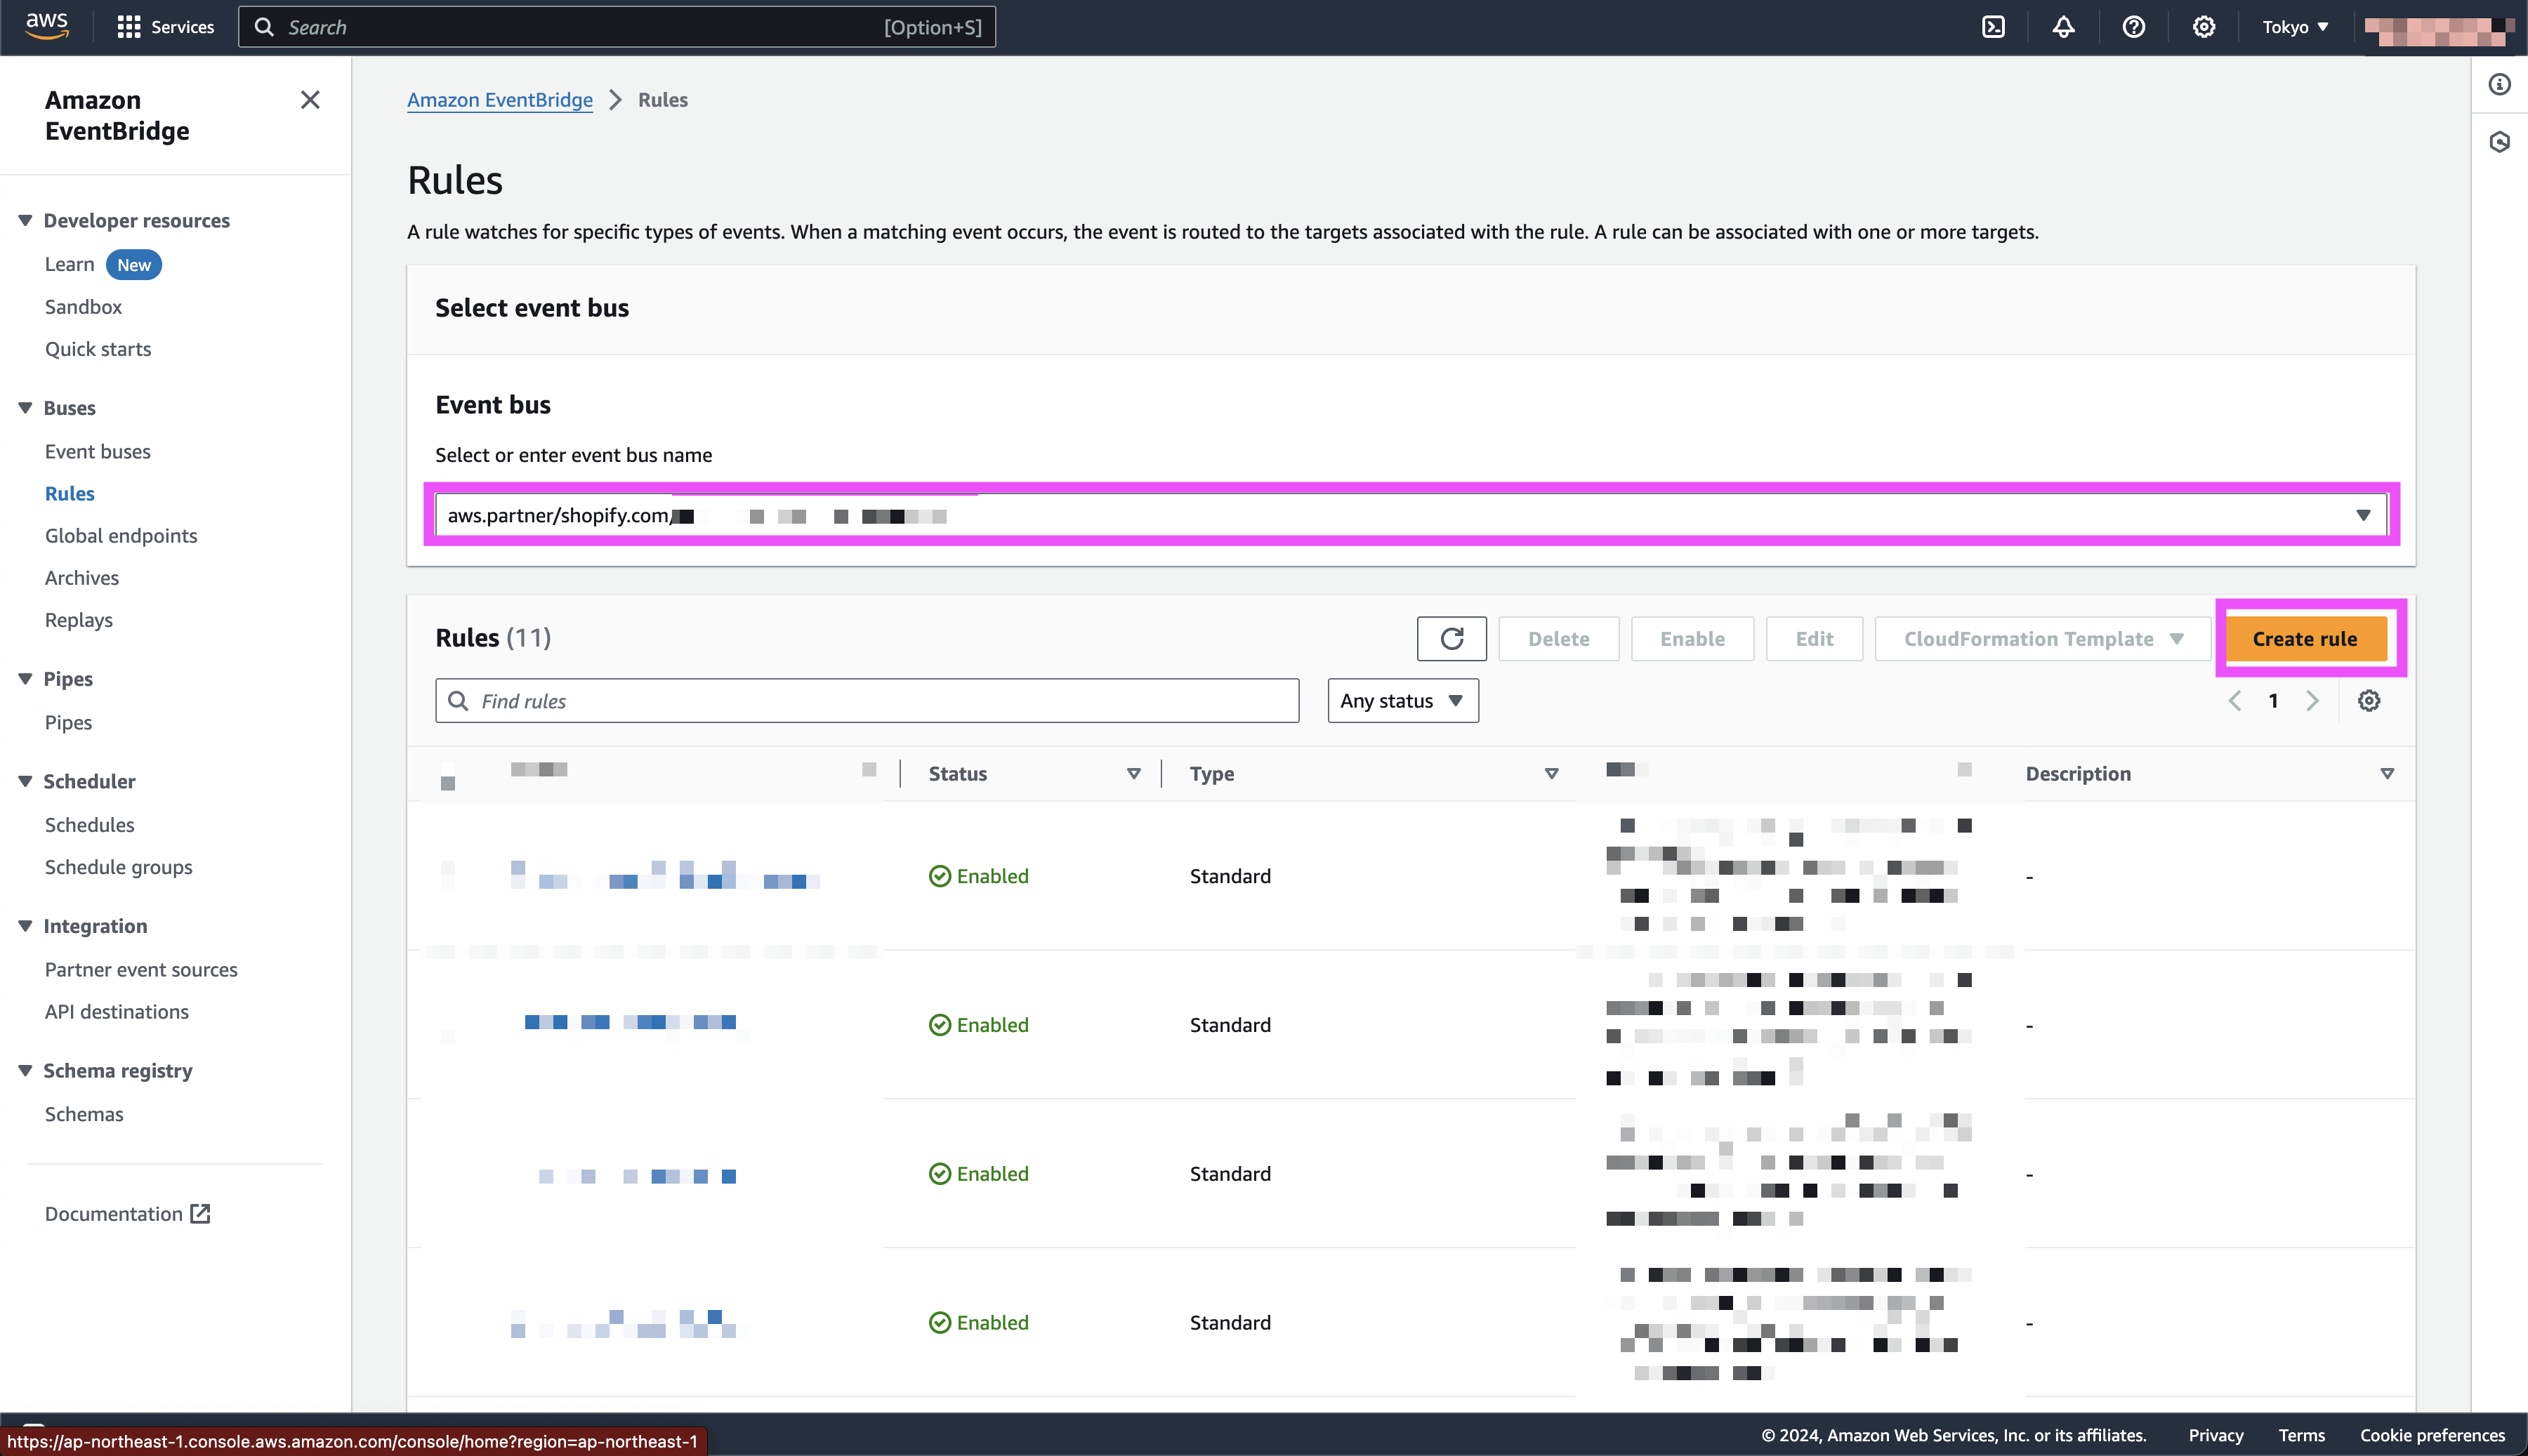
1. AWS consoleから対象のEventBridge Rulesを開く
対象のEventBusを選択して Create Rule を押す。
2. 「Build event pattern」を開く
Define rule detailのnameは適当に入れる。
3. Sample eventでJsonを入れる
「Enter my own」を選択して「Misc > Webhook Sample」にあるようなテスト用のJsonを入れる。
以下はShopifyの inventory_items/create の実データをマスクしたもの。
{
    "version": "0",
    "id": "xxx-xxx-xx-xxx",
    "detail-type": "shopifyWebhook",
    "source": "aws.partner/shopify.com/000000/test",
    "account": "000000000000",
    "time": "2025-03-01T06:29:19Z",
    "region": "ap-northeast-1",
    "resources": [],
    "detail": {
        "payload": {
            "id": 100000000000,
            "sku": "",
            "created_at": "2025-03-01T01:29:17-05:00",
            "updated_at": "2025-03-01T01:29:17-05:00",
            "requires_shipping": true,
            "cost": null,
            "country_code_of_origin": null,
            "province_code_of_origin": null,
            "harmonized_system_code": "111111",
            "tracked": true,
            "country_harmonized_system_codes": [],
            "admin_graphql_api_id": "gid://shopify/InventoryItem/0000001"
        },
        "metadata": {
            "Content-Type": "application/json",
            "X-Shopify-Topic": "inventory_items/create",
            "X-Shopify-Shop-Domain": "test.myshopify.com",
            "X-Shopify-Hmac-SHA256": "xxxx",
            "X-Shopify-Webhook-Id": "xxx-xxx-xxx-xxx-xxxx",
            "X-Shopify-API-Version": "2024-10",
            "X-Shopify-Triggered-At": "2025-03-01T06:29:17.989779121Z"
        }
    }
}
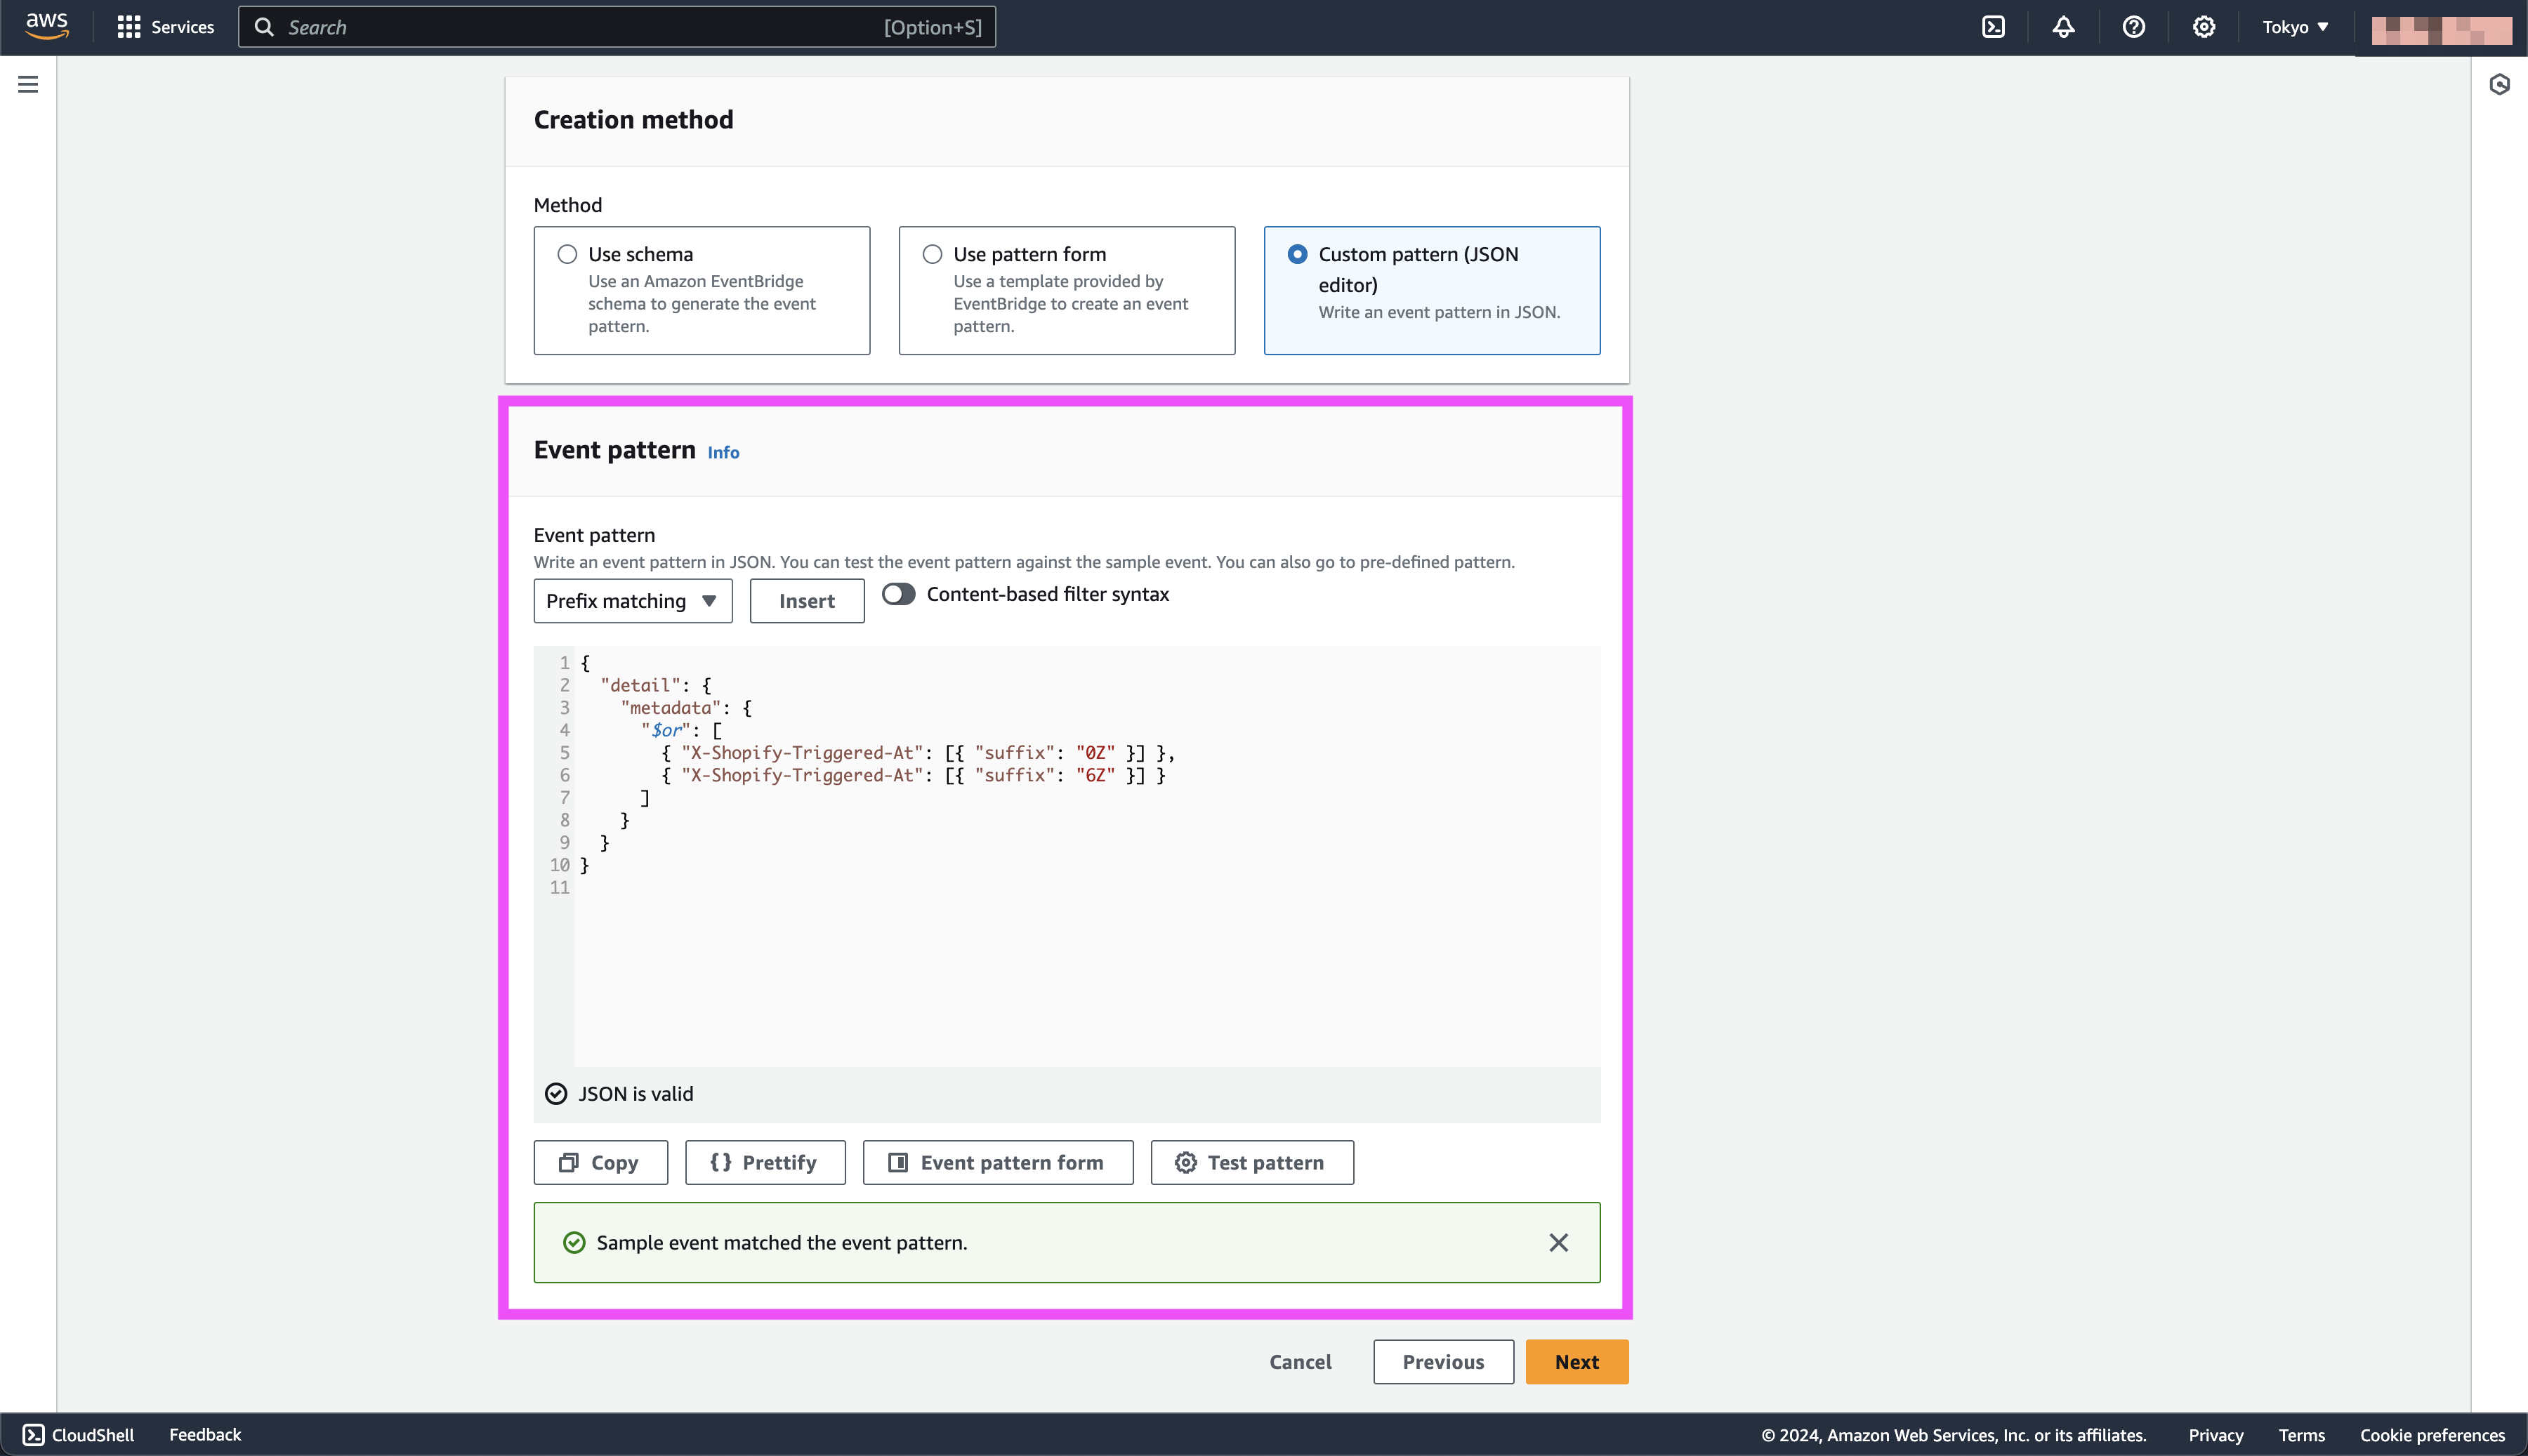
4. Event patternを入力してテストをする
検証したいEventBridge Ruleを貼り付けて 「Test pattern」 をすると検証できる。
得られた結果・所感
AWS ConsoleからEventBridge Ruleの検証を気軽にできるようになった。
suffix-matchingの仕様が直感から反するのでメモをしておく。
次のサンプルは FileName のsuffixが .png のものだけひっかかるようなRule。
{
    "FileName": [ { "suffix": ".png" } ]
}
suffixはstringのみを受け付けておりintegerは許可されていない。
なので、 id: 12345 のようなinteger値が飛んできた時に次のRuleは発火しない。
{
    "id": [ { "suffix": "5" } ]
}
今後の展開・検討事項
CIでテストする方法がないか追加で調査する。